Collaborative Learning in Classrooms: 6 Layout Ideas for Schools

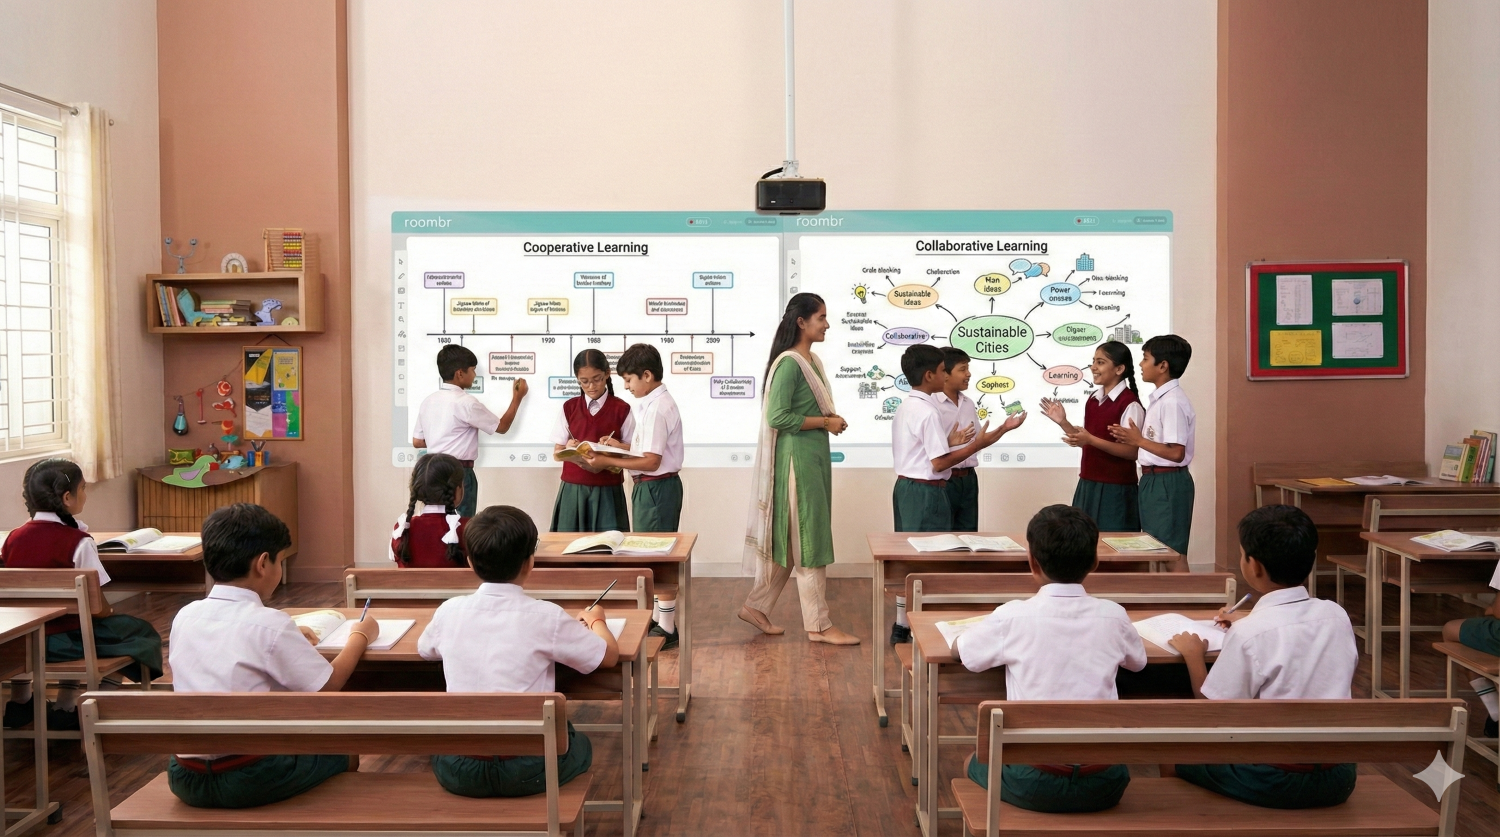
If you walk into a standard 9th-grade classroom in any busy Indian school, whether in Mumbai, Bengaluru, or Delhi, you will likely see a similar seating arrangement. There are rows of heavy wooden benches facing a blackboard, packed wall-to-wall with 40 to 50 students.
For decades, this rows and columns arrangement has served a singular purpose: discipline. It is designed for silence, for listening, and for facing the front.
But today, the mandate has changed. The National Education Policy (NEP) 2020 explicitly pushes for a shift from rote memorization to collaborative learning. Principals and academic coordinators are now asking teachers to conduct group activities, debates, and peer reviews.
The problem? The classroom size hasn’t changed.
Teachers are asking a very valid question: "How am I supposed to conduct group work when there is hardly any space to walk between the benches?"
This guide is not about knocking down walls or reducing class strength. It is about space hacking. Here are practical, high-impact layout ideas to foster cooperative learning in compact Indian classrooms.
How Does Seating Arrangement Affect Learning?
Research confirms that where students sit dictates how they learn. Research from Steelcase Education indicates that shifting from standard row seating to active learning environments can boost student engagement by as much as 84%.
When students face only the teacher, they are in passive listening mode. When they face each other, they shift into active collaboration mode.
For Indian educators, this shift is critical. It turns the classroom from a place of instruction (teacher speaking) to a hub of construction (students building knowledge). The right layout doesn't just change the view. This approach enhances memory retention, fosters collaboration among classmates, and boosts test scores.
The Pre-Requisites: Before You Move the Benches
Before we discuss the layouts, we must address the two biggest space killers in Indian classrooms. If you don’t solve these, no amount of rearranging will help.
1. The School Bag Menace
In a class of 45 students, you have 45 bulky school bags. Usually, these end up in the aisles or hanging off the back of chairs, blocking movement.
The Fix: Install sturdy hooks or weld simple metal pegs onto the side of each desk frame. This keeps heavy bags off the floor and clears the aisles, allowing students to move freely during group work.
2. The Bulky Tech Trap
This is where smart classroom design often fails. Many schools buy expensive Interactive Flat Panels (IFPs) mounted on heavy trolleys or stands.
The Reality: These stands occupy nearly 10-15 square feet of the most valuable real estate in the room—the front center.
The Fix: To truly open up space, your smart classroom equipment needs to be zero-footprint. This is where wall-mounted solutions (like Roombr) excel. By projecting directly onto the wall, you reclaim that critical front zone for student interaction.
6 Layout Ideas for the Compact Indian Classroom
We have selected these layouts assuming you are working with standard dual-desk benches and a class strength of 40+.
1. Preferential Seating for Students With Disabilities (The Inclusive Layout)
Best for: Ensuring NEP 2020 compliance and supporting diverse learners.
Before we arrange the class for group work, we must arrange it for access. In an inclusive Indian classroom, students with visual impairments, hearing loss, or attention difficulties (ADHD) often get lost in the back rows.
- How It Works: These students are seated in a Golden Triangle zone—front and center, or slightly off-center depending on their specific need (e.g., a student with right-ear hearing loss should sit on the left side of the room).
- The Collaborative Benefit: Inclusion is the first step of collaboration. By placing these students in the primary field of vision, you ensure they are easily included in front-row discussions and aren't socially isolated during peer activities.
- The Tech Angle: This is where smart classroom design becomes a lifeline. With a massive wall-mounted display like Roombr, students in preferential seating don't need to strain to see small details. The content is immersive and right in front of them, leveling the playing field.
2. The Paired Rows
Best for: Narrow classrooms with fixed furniture constraints.
This offers the simplest shift away from the conventional layout. Instead of having four separate columns of desks with aisles in between, you push two columns together to create long horizontal blocks.
- How It Works: In a standard setup, students sit in pairs (2-2-2-2). In Paired Rows, you eliminate the middle aisle to create a block of four (4-4-4).
- The Collaborative Benefit: This instantly creates a Think-Pair-Share environment. Students can easily turn to their neighbor or the person immediately behind them without leaving their seats.
- Why it works: It requires minimal movement. A teacher can switch from Lecture Mode to Group Mode in under 60 seconds, which is crucial when you only have 40 minutes.
3. The Herringbone Arrangement
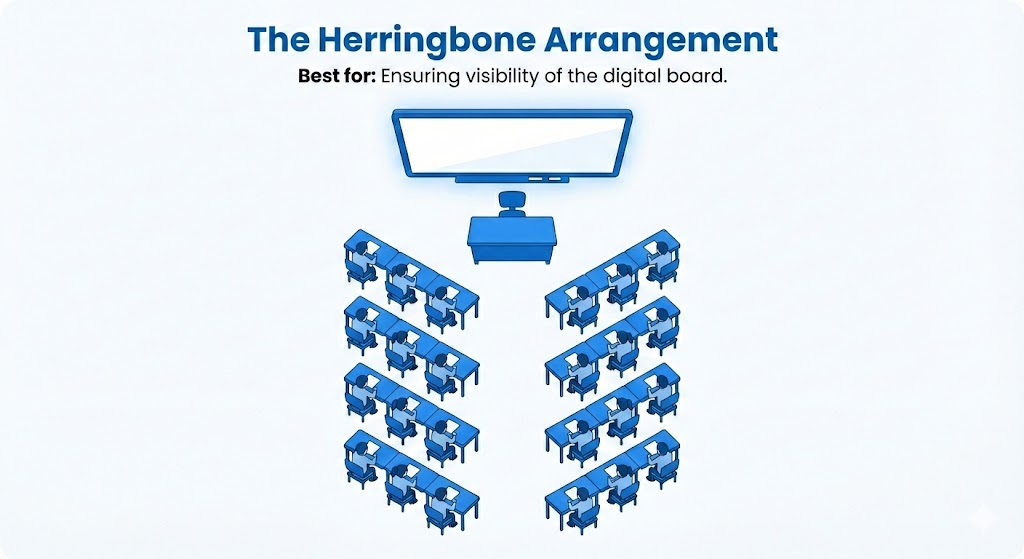
Best for: Ensuring visibility of the digital board.
In a traditional grid, students in the back corners often struggle to see the smart board, leading to disengagement. The Herringbone layout angles the desks slightly (about 30-45 degrees) towards the center of the room.
- How It Works: Imagine the skeleton of a fish. The central aisle remains open, but the desks on the left and right are angled inward.
- The Collaborative Benefit: This improves the line of sight for every student. When it’s time for collaborative learning, students can swivel their chairs to form small triads with the row behind them.
- The Tech Angle: This is arguably the best digital classroom setup. It reduces glare and ensures that, whether you are showing a 3D biology simulation or a math problem on your Roombr wall, no student has to crane their neck.
4. The Double-U
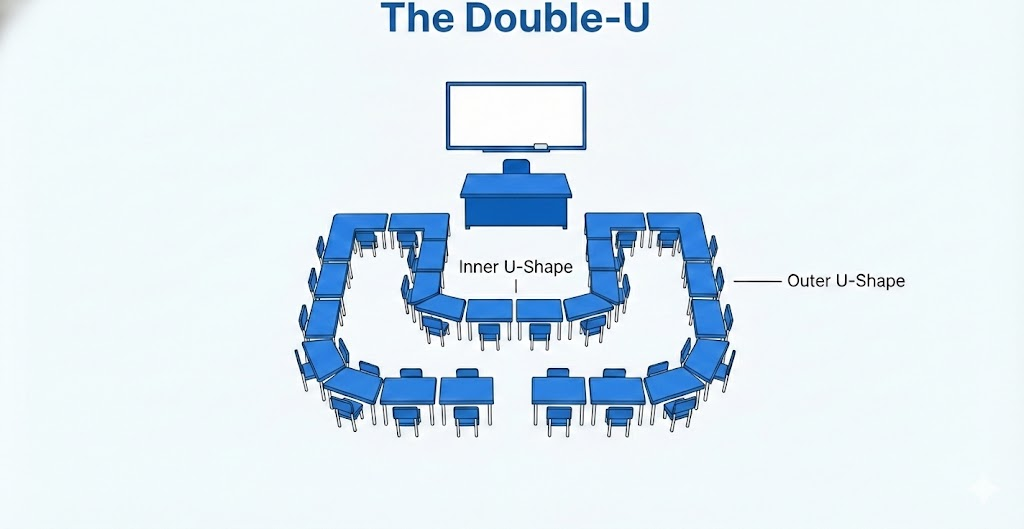
Best for: Debates, Language classes, and Social Sciences
If your goal is whole-class discussion, the Double-U is a game-changer. You arrange the desks in two concentric U-shapes facing the teacher/board.
- How It Works: An inner U-shape of desks sits close to the front, and an outer U-shape wraps around them.
- The Collaborative Benefit: It removes the backbencher psychology. It creates a classroom environment where everyone enjoys a front-row view. It allows for Fishbowl activities, where the inner circle debates a topic while the outer circle takes notes and provides feedback.
- Space Warning: This requires a wider room. It may not work in long, narrow train carriage style classrooms.
5. The Quad Clusters
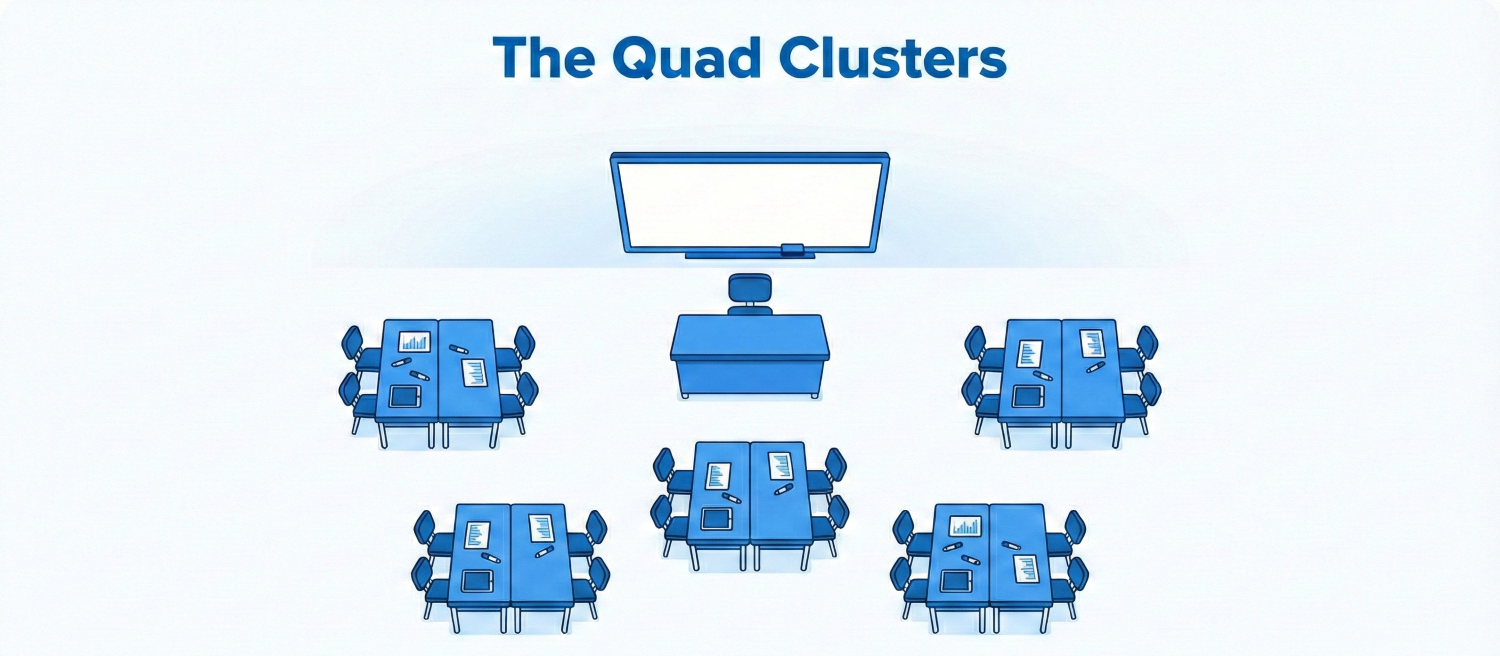
Best for: Project work, art, and ab activities.
This is the classic cooperative learning formation. You push two benches face-to-face to create a pod of 4 to 6 students.
- How It Works: You create small islands of desks throughout the room.
- The Collaborative Benefit: This is ideal for team-based projects where students need to share materials (charts, markers, tablets). It shifts the focus away from the teacher and onto the group.
- The Discipline Challenge: In this layout, half the students have their backs to the teacher. This requires a teacher who is comfortable moving around the room (facilitator mode) rather than standing at the podium (lecturer mode).
6. The Perimeter Focus
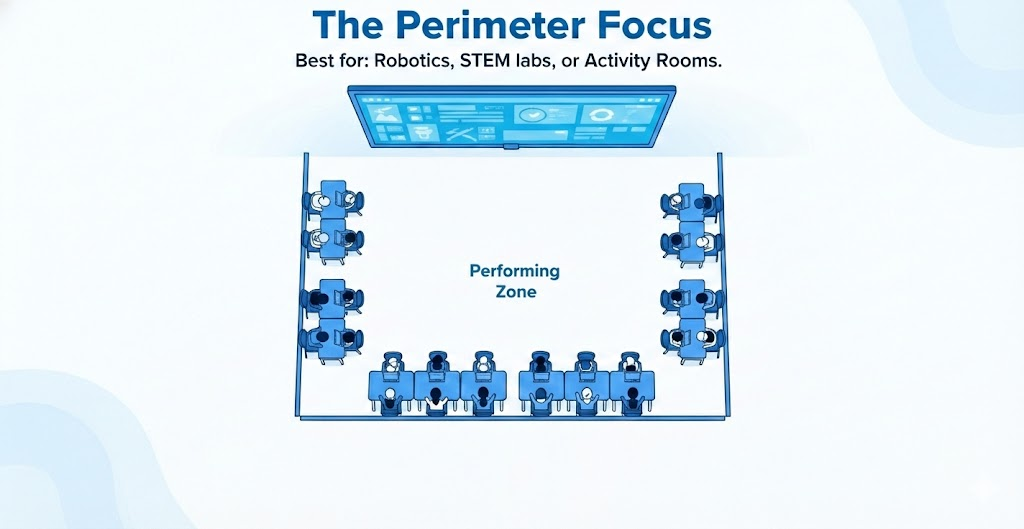
Best for: Robotics, STEM labs, or Activity Rooms.
If you have a dedicated activity room or a slightly larger classroom, try pushing all desks against the walls, facing outward.
- How It Works: The center of the room is left empty.
- The Collaborative Benefit: The center becomes a Performing Zone. Students can sit on the floor for circle time, enact a play, or build a robot structure. When they need to write, they return to their perimeter desks.
- The Roombr Synergy: This layout is perfect for Roombr. Since Roombr turns the wall into an interactive surface, students at the perimeter desks can work directly on the wall-mounted interface without blocking anyone's view.
Why Hardware Dictates Design
You cannot design a modern classroom with outdated tools.
If you adopt the Double-U or Herringbone layout to improve visibility, but your digital screen is a small 65-inch TV mounted in the corner, you have defeated the purpose. Students at the other end still won't be able to read the text.
This is why smart classroom equipment decisions are design decisions.
Collaborative learning relies on shared visibility. The content, whether it's a map of India or a geometry proof, must be large enough, bright enough, and placed intuitively enough that a student sitting in the last row of a Quad Cluster feels just as involved as the student in the front.
The Roombr Philosophy
At Roombr, we believe the classroom infrastructure should disappear.
- We don’t use stands that trip students.
- We don’t use small screens that force students to squint.
- We turn the walls you already have into the learning tool you need.
Conclusion
Transitioning to a collaborative setup doesn't happen overnight. It takes time for students (and teachers) to get used to the new movement patterns.
Our advice? Start with the Paired Rows on a Monday. It takes a few minutes to set up, requires no approval from the management for new furniture, and immediately signals to your students that today, we are learning together.
When you are ready to take the next step, transforming not just the furniture, but the walls themselves, we are here to help.
Is your classroom layout holding back your teaching potential? Find out here how Roombr Digital Classroom can turn your compact classroom into a spacious, interactive learning hub without adding a single inch of floor space.

Foziya Abuwala
Share
Step Into the future of
Education with Roombr